Publisher’s Notes: We have Bren Boone, our Artist in Residence, back for you this week to talk about her approach to sampling and combing. We are sure you are going to love Bren’s down to earth and practical steps. Take it away, Bren!
Sampling: Make A Plan
I know what you’re thinking. Make a plan? I hear it all the time. “I just let the fiber tell me what it wants to be”, and that’s ok. But not always! Sometimes things don’t go the way you thought they would at all when spinning yarn. Maybe the technique you used just wasn’t a good idea for the fiber you used. Maybe the idea you originally had just didn’t translate well to your yarn. Maybe the plying technique wasn’t a good idea. Maybe the wpi was too thin for the colors changes and your beautiful colorful yarn turned to mud. It happens all the time. I usually have an idea (as I think is the case with most of us) of what kind of yarn I want to make as soon as I see a fleece. But just because I think my idea may be good, doesn’t necessarily mean that it actually is. This is why it’s good to have a plan which involves making samples. YES, I said it: Samples, samples, samples.
Ok. It’s been said. That dreaded word; SAMPLE. It’s almost as hideous as the word SWATCH. But, taking a little extra time to do this step will save a lot of potential heartache later on.
What I discovered when working with both of these fleeces, is that I didn’t like the blend with mohair. (see this post for details about the fleeces) I was so surprised. Though the mohair fleece I’m using is very soft, the staple lengths of both were close enough not to have any issues while combing. I didn’t like the look I was getting when I was finished plying the yarn at a solid dk weight. Now that I’ve worked with this mohair, I think it should still be combed, but spun by itself as a boucle yarn. So I will save it for another project and work strictly with the cormo instead.
This is why I take the time to make several different samples and dye them. Doing this helps you to know exactly what to expect and gives you the opportunity to play around with color. I know that this particular comro fleece is very crimpy, which means I should expect a lot of blooming. I want a dk weight yarn that’s Navajo plied. I would normally spin my singles at 28 wpi. Since I’m using 100% cormo wool. I may want to make it slightly thinner.
I know you’re asking how I came up with 28 wpi. Let me explain. This is a good rule of thumb to use when you’re spinning for a specific weight: For a 2 ply multiply (or divide) by 1.5. For a 3 ply multiply (or divide) by 2. These little equations don’t always work but most of the time, they will put you in the ball park of where you want to be. Since dk weight is between 12-14 wpi, if I multiply by 2 for a 3 ply yarn, it will put me at 24-28 wpi for my singles. For a 2 ply, if I multiply by 1.5, it will put me at 18-21 wpi for my singles.
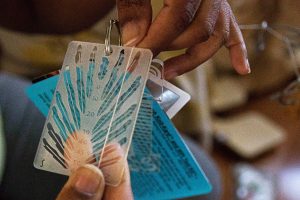
After I had my math figured out, I made several small samples. Some of the samples I made had the mohair blend, which is why I know it wasn’t going to work for me. I use a Spinners Control Card to help me keep track of my wpi while spinning. I also use an angle tool. I prefer a plump look to my plied yarn so I know if I keep my twist angle between 35 and 45 degrees, I’ll get just the look that I want. Both of these tools are something that I use every single time I spin and they never let me down. Being able to periodically measure my yarn while I’m spinning, really helps me to stay consistent and produce a beautifully finished product. So I urge you to take some time to make a few samples, you may be surprised at how much your mind will change.
Now lets move on to a more in depth discussion about combing.
Combing 101
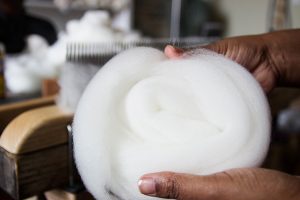
Combing is the process of aligning your fleece so that all the fibers are going in the same direction while also removing the short staples, second cuts, and vegetable matter. The product you get from combing is combed top, which is a worsted fiber preparation. This is a smooth fiber preparation, which is prefect for spinning with a short forward or backwards draw technique.
The first thing you should know is that not all combs are created equal. Some combs only have one set of teeth (also called a “pitch”). Some combs are 2, 3, 4 and even 5 pitch. Some combs are mini combs and some are large. Some combs have teeth that are further apart and some that are closer together. This is a key factor in the success of your prep work. The thicker and coarser your fleece is, the further apart the teeth need to be. The finer your fleece is, the closer the teeth need to be. What size combs you decide to get really is up to you. You may have hand/ wrist issues. In that case I would recommend getting a set of mini combs. They’re lighter weight and easier on your range of motion. The only drawback to mini combs is only being able to comb a small amount of fleece at a time, but if this keeps your hands and wrists from aching, then it’s worth it! If you don’t have issues with your hands and wrists, you make want to invest in a larger set of combs. Another thing to think about is how many pitches or rows of teeth do you want. The coarser your fleece is, the fewer rows you need. Also fewer rows of teeth may require more passes on the combs to get the nice smooth prep you may want. More rows require less passes, but you will have more waste.
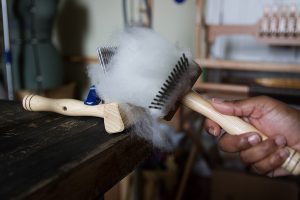
Although I have many sets of combs now, I find that I use 2 pitch combs the most. I also like an extra fine setting since I find that I can work with multiple fleece types with them and get results I’m very happy with. For this project I’m using a set of Majacraft Mini Combs. They are comfortable in my hands and the teeth setting are a great fit for cormo fleece. Since they are smaller combs, I’m also using the Majacraft blending hackle.
A blending hackle is similar to combs. It’s like a wool comb that’s been supersized. Combs can be clamped to a surface or both can be held in your hands. A hackle has to be clamped to a nice sturdy surface to be used properly. Like combs, they can have teeth settings that are closer or further apart. They can also have single or multiple pitches. The most I’ve seen on a hackle is 3 pitches. You can use a hackle many ways. I love blending colors and different fibers on mine but for this project, I’m using it to be able to process more fleece at one time. I’m combing the fleece with the combs but instead of dizzing off the combs, I’m combing my last pass onto the hackle. I’m adding 3-4 bundles from the combs, then I’m dizzing off the hackle from there into a larger bundle of combed top.
HOW TO COMB
Combing takes practice. First, if you washed your fleece to keep the staples intact, you can easily load your combs cut end first leaving only a small amount showing in back. Make sure not to overload your combs. I like my combs about 1/3 full. Also make sure not to leave your fleece bunched up at the bottom. It will make combing much easier and you won’t get tangles. I clamped one of my combs to my work table to make it easier for me to work. You don’t have to clamp if you don’t want to.
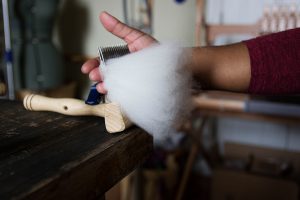
Starting at the very tips of the fleece start combing onto the empty comb in your hand, in a back and forth motion, flipping the combs to keep the fiber distribution even.
Once you have the comb in your hand full, remove whatever waste is on the first comb. Space the fiber back out and lash back onto your comb again starting at the very ends again. How many passes you do will depend on the condition of your fleece. If’s it’s an uncoated fleece, it may need a few more to remove the vegetable matter.
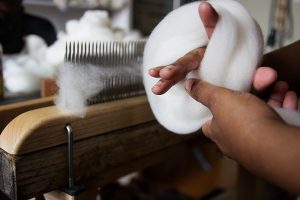
Once you’re done combing, you can diz off the fiber you’ve combed using a diz or even your hands if you don’t have one. But a diz can be anything, even a button. All you need is something with a small hole. Thread your fiber though the hold and carefully start pulling your fiber out a few inches at a time. Keep in mind the staple length of your fiber. Don’t pull to far apart or it will come apart. It’s ok if it does, Just thread the fiber back through the hole and start again.
Since I have a hackle, I decided to lash several bundles from the combs before I dizzed off. This makes a larger bundle to spin from.
More than anything take your time, be patient with yourself, and practice!!
Practicing your combing technique and then making samples from your practice prep is a perfect combination. You may think it’s a waste but I promise it’s not. There’s always a use for those cute little samples. You can make swatches with them and then combine them all in a blanket! That’s what I’m doing with mine.
Have fun and I’ll talk to everyone again soon!
Bren






So well done, Bren! I have washed Cormo fleece ready for the combs! This is a perfect lesson for me and so well explained. Love this series!
Bren Boones a very talented lady.